Maintaining a clean Keurig coffee maker is essential for ensuring each cup of coffee is as delightful as the first. Over time, coffee oils, mineral deposits, and residual grounds can accumulate within your machine, affecting both the taste of your brew and the longevity of the appliance. Regular cleaning not only preserves the flavor and quality of your coffee but also extends the lifespan of your Keurig, ensuring it continues to serve you efficiently for years to come.

In this guide, we’ll walk you through the importance of cleaning your Keurig, providing clear, step-by-step instructions to address common issues such as mold growth, scale buildup, and performance inefficiencies. By following these practices, you can enjoy consistently great-tasting coffee while keeping your machine in optimal condition.
Why Cleaning Your Keurig Coffee Maker is Essential
Improve Coffee Taste
Over time, coffee oils and residues can build up inside your Keurig, leading to a stale or bitter taste in your coffee. This buildup affects the flavor and quality of your brew.
Prevent Bacteria and Mold Growth
The moist environment of your coffee maker is a breeding ground for mold and bacteria. If not cleaned regularly, these microorganisms can develop, potentially leading to health risks such as stomach discomfort.
Extend the Lifespan of the Machine
Regular cleaning prevents clogs and ensures all parts of the machine function correctly. This maintenance extends the lifespan of your Keurig, providing you with many more years of excellent coffee.
Optimize Machine Performance
Cleaning helps the machine run more efficiently. Without regular maintenance, mineral deposits can clog essential components, making your Keurig work harder than necessary.
How to Clean Your Keurig Coffee Maker: A Step-by-Step Guide
Regular cleaning of your Keurig coffee maker ensures that each cup of coffee is fresh, flavorful, and free from unwanted residues. Following these steps will help maintain your machine’s performance and extend its lifespan.
Step 1: Turn Off and Unplug the Machine
Before starting the cleaning process, always ensure your safety by turning off and unplugging the machine. This prevents any electrical hazards and ensures that the machine doesn’t accidentally start brewing during cleaning.
Step 2: Remove and Clean the Water Reservoir
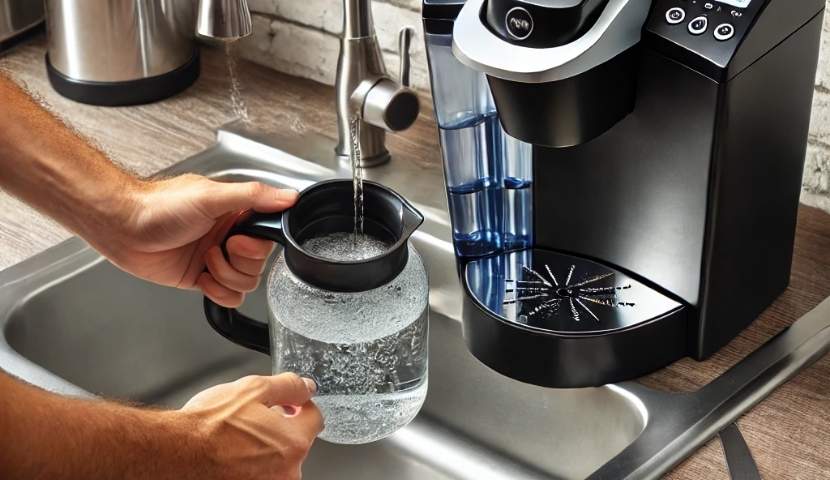
- Empty the Reservoir: Carefully remove the water reservoir from the machine and pour out any remaining water.
- Wash with Mild Soap and Water: Using warm water and a mild dish soap, wash the reservoir thoroughly to remove any mineral deposits or residues.
- Dry Thoroughly: After washing, dry the reservoir completely with a clean cloth or let it air dry to prevent any mold or mildew growth.
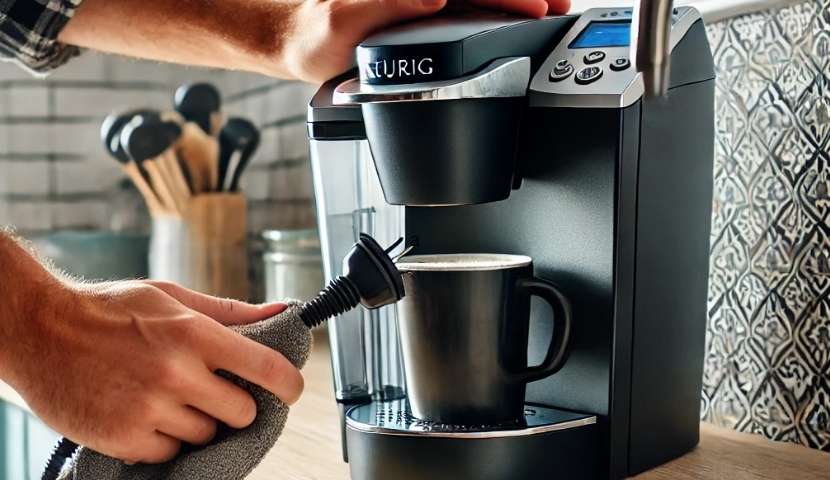
Step 3: Clean the K-Cup Holder and Needle
- Remove the K-Cup Holder:
- Gently pull the K-Cup holder out from the machine.
- Detach the funnel from the holder if they are separate.
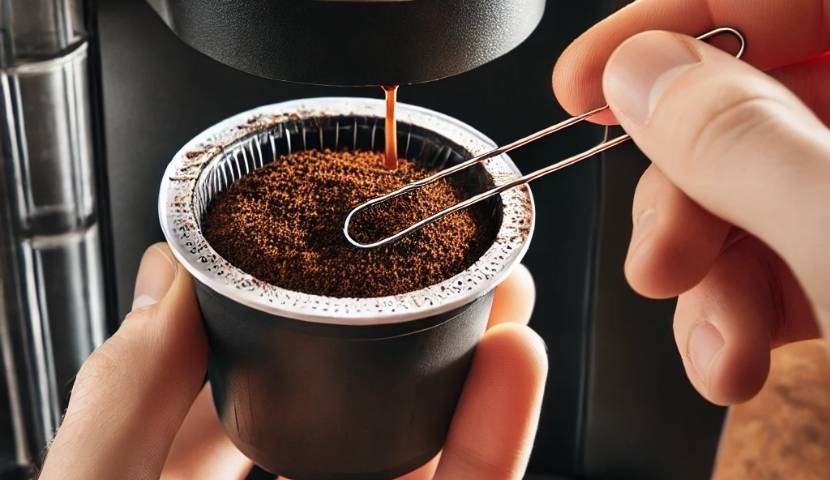
- Clean the Needle Area:
- Using a straightened paperclip, carefully insert it into the entrance needle (located under the brewer head) to dislodge any coffee grounds.
- Wash the K-Cup Holder:
- Wash both the holder and funnel with warm, soapy water.
- Use a sponge or cloth to scrub away any remaining coffee grounds.
- Rinse thoroughly and let them dry completely.
Step 4: Descale the Machine

Descaling removes mineral buildup that can affect the machine’s performance and the taste of your coffee.
- Prepare the Descaling Solution: You can use either a commercial descaling solution or a mixture of equal parts white vinegar and water.
- Fill the Reservoir: Pour the descaling solution into the water reservoir up to the maximum fill line.
- Initiate the Descaling Mode:
- Place a large mug on the drip tray.
- With the machine plugged in but turned off, press and hold the ‘8 oz’ and ’12 oz’ buttons simultaneously for about 3 seconds until the ‘Descale’ light illuminates.
- Run the Descaling Cycle:
- Press the flashing ‘BREW’ button to begin the descaling process.
- Discard the contents of the mug.
- Repeat the brewing process until the ‘Add Water’ indicator lights up.
- Let the Machine Rest: Allow the machine to sit for 30 minutes to an hour to let the descaling solution break down mineral deposits.
- Rinse the Reservoir:
- Empty any remaining descaling solution from the reservoir.
- Wash and rinse the reservoir thoroughly.
- Flush the Machine:
- Fill the reservoir with fresh water up to the maximum fill line.
- Place the mug back on the drip tray.
- Run multiple water-only brew cycles (at least 12) to ensure all descaling solution residues are flushed out.
Step 5: Clean the Exterior
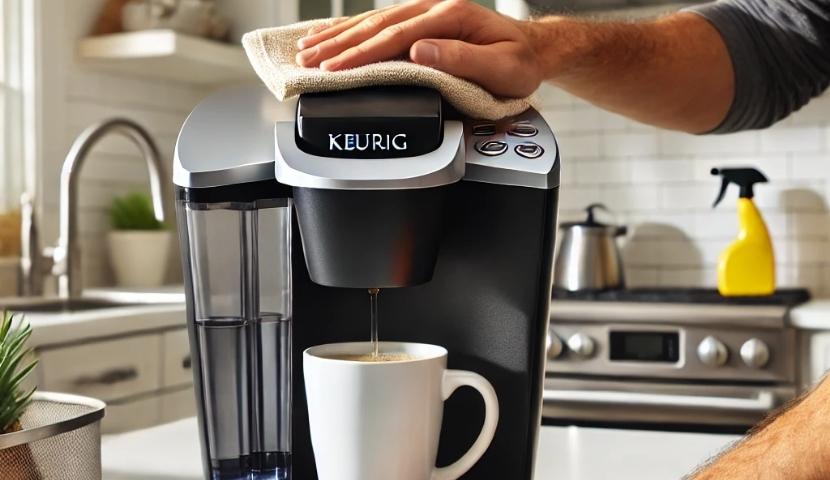
- Wipe Down Surfaces: Using a soft, damp cloth, gently wipe the exterior surfaces of the machine to remove any spills or stains.
- Dry the Machine: Use a dry cloth to buff the surfaces and remove any remaining moisture.
Step 6: Run Fresh Water Cycles
After cleaning, it’s essential to ensure that no cleaning solution remains in the machine.
- Fill the Reservoir:
- Fill the water reservoir with fresh, clean water up to the maximum fill line.
- Run Brew Cycles:
- Place a mug on the drip tray.
- Without inserting a K-Cup, press the ‘BREW’ button to run a water-only cycle.
- Discard the water.
- Repeat this process until the water reservoir is empty.
- Final Check:
- Ensure that the ‘Descale’ light is no longer illuminated.
- If the light remains on, repeat the descaling process.
How Often Should You Clean Your Keurig?
Cleaning your Keurig coffee maker is essential for ensuring each cup of coffee is fresh, flavorful, and free from unwanted residues. Establishing a regular cleaning routine helps prevent issues such as mold growth, mineral buildup, and clogged components, all of which can affect the taste of your coffee and the longevity of your machine.
Daily Maintenance
Incorporating simple daily habits can significantly extend the life of your Keurig and enhance your coffee’s flavor:
- Empty Used Pods: After each brew, promptly remove and discard used K-Cups to prevent mold and bacteria growth.
- Clean Removable Parts: Regularly clean components like the drip tray, water reservoir, and K-Cup holder to prevent buildup.
- Flush the System: Run a water-only brew cycle daily to clear any residual coffee grounds and oils, ensuring a clean brewing environment.
Weekly or Bi-Weekly Deep Cleaning
A more thorough cleaning every week or two helps address areas that daily maintenance might miss:
- Clean the Needles: Coffee grounds can accumulate in the needles that puncture K-Cups, leading to clogs and uneven brewing. Use a paperclip or the provided cleaning tool to gently clear any debris.
- Deep Clean Removable Parts: Detach and wash the K-Cup holder, drip tray, and water reservoir with warm, soapy water to remove coffee oils and prevent mold growth.
- Wipe the Exterior: Use a soft, damp cloth to clean the machine’s exterior, removing any spills or stains that could harbor bacteria.
Monthly Descaling
Descaling is crucial for removing mineral deposits that accumulate from tap water, especially in areas with hard water:
- Why Descale: Mineral buildup can clog internal components, affecting water flow and coffee temperature. Regular descaling prevents these issues and maintains optimal machine performance.
- Descaling Frequency: Depending on your water hardness and usage, aim to descale your Keurig every 1 to 3 months. If you brew more than 8 cups daily, consider descaling every 6 to 8 weeks.
- Descaling Process: Use a descaling solution or a mixture of white vinegar and water. Fill the water reservoir with the solution, run a descaling cycle, and follow up with several water-only cycles to rinse the machine thoroughly.
Common Keurig Cleaning Issues and How to Fix Them

Regular cleaning helps prevent common issues that can affect your Keurig’s performance and the quality of your coffee:
Mold or Mildew Buildup
The moist environment inside your Keurig can foster mold and mildew growth if not cleaned regularly:
- Identification: Signs include visible mold in the water reservoir or K-Cup holder, and musty odors during brewing.
- Solution: Clean all removable parts weekly with warm, soapy water. Ensure the water reservoir is emptied and dried thoroughly between uses to prevent mold growth.
Scale Buildup and How to Prevent It
Mineral deposits from hard water can accumulate inside your machine, leading to clogs and reduced efficiency:
- Identification: Slow brewing times and reduced water flow are common indicators of scale buildup.
- Solution: Regular descaling, as mentioned above, helps prevent mineral accumulation. Using filtered or bottled water can also reduce mineral content.
Clogged Needles
The needles that puncture K-Cups can become clogged with coffee grounds, affecting the brewing process:
- Identification: Symptoms include slow brewing, weak coffee, or the machine not brewing at all.
- Solution: Regularly clean the needles using a paperclip or the provided tool to dislodge any coffee grounds. Be gentle to avoid damaging the needles.
Coffee Tastes Bad After Cleaning
If your coffee tastes off after cleaning, it could be due to residual cleaning solutions or improper maintenance:
- Potential Causes:
- Residual Cleaning Solution: Not thoroughly rinsing the machine after descaling can leave a vinegar or chemical taste.
- Old Water Filter: Using an expired or ineffective water filter can affect water quality and taste.
- Solutions:
- Rinse Thoroughly: After descaling, run multiple water-only brew cycles to ensure all cleaning solution residues are flushed out.
- Replace Water Filter: If your Keurig has a water filter, replace it every two months or after brewing 60 tanks of water to maintain optimal water quality.
Tips and Tricks for Maintaining Your Keurig Coffee Maker
Ensuring your Keurig coffee maker remains in top condition involves regular maintenance and mindful usage. Here are some tips to enhance its longevity and performance:
Use Filtered Water
Utilizing filtered water in your Keurig offers multiple benefits:
- Reduces Mineral Buildup: Filtered water minimizes calcium and magnesium deposits, commonly known as scale, which can accumulate within the machine over time. This reduction in mineral buildup helps maintain the internal components, ensuring efficient operation and prolonging the lifespan of your coffee maker.
- Improves Coffee Taste: Tap water often contains minerals and chemicals that can affect the flavor of your coffee. By using filtered water, you can enhance the purity and taste of your brew, allowing the coffee’s natural flavors to shine.
Store the Machine Properly
Proper storage is essential, especially if you don’t use your Keurig daily:
- Keep It Dry: Ensure the machine is thoroughly dried before storing to prevent mold and mildew growth.
- Avoid Direct Sunlight: Store the coffee maker in a cool, dry place away from direct sunlight to prevent any potential damage to its components.
- Empty Water Reservoir: Before storing, remove any water from the reservoir to prevent stagnation and potential scaling.
Regularly Replace Parts
To maintain optimal performance, periodically replacing certain components is crucial:
- Water Filter: If your Keurig model uses a water filter, it’s advisable to replace it every two months or after brewing approximately 60 tanks of water. Regular replacement ensures effective filtration, improving both the taste of your coffee and the machine’s longevity.
- K-Cup Holder and Needles: Over time, coffee grounds can clog the K-Cup holder and needles, affecting the brewing process. Regular cleaning is essential, and if you notice persistent issues, consider replacing these parts.
Conclusion
Regular maintenance of your Keurig coffee maker is essential to ensure a consistently delightful coffee experience and to extend the machine’s lifespan. By incorporating the practices outlined above—such as using filtered water, proper storage, and timely replacement of components—you can enjoy high-quality brews for years to come.
“We invite you to share your own cleaning tips or ask any questions in the comments section below. Engaging with our community helps everyone enhance their coffee-making journey.“
FAQs
Can I use vinegar to clean my Keurig?
Yes, vinegar is an effective and natural descaling agent that can help remove mineral buildup in your Keurig. To use vinegar for cleaning:
- Empty the Water Reservoir: Remove any water from the reservoir.
- Add Vinegar Solution: Fill the reservoir with equal parts white vinegar and water.
- Run Descaling Cycle: Place a large mug on the drip tray and run a brewing cycle without a K-Cup. Dispose of the contents.
- Repeat if Necessary: Continue the process until the “Add Water” indicator lights up.
- Rinse the Machine: Fill the reservoir with fresh water and run several brewing cycles to remove any vinegar residue.
Regular descaling with vinegar helps maintain your machine’s performance and the quality of your coffee.
How do I know when to descale my Keurig?
Keurig machines typically signal when it’s time to descale:
- Descale Indicator: Many models have a “Descale” light that illuminates after a certain number of brews, indicating the need for descaling.
- Reduced Brewing Speed: If your coffee takes longer to brew than usual, it may be a sign of mineral buildup.
- Inconsistent Brewing: Experiencing weak or uneven coffee strength can also suggest the machine needs descaling.
Descaling every 1 to 3 months, depending on usage and water hardness, helps prevent mineral accumulation and maintains optimal machine performance.
What should I do if my Keurig is still not brewing properly after cleaning?
If your Keurig continues to have issues after cleaning:
- Check for Clogs: Ensure that the needles and K-Cup holder are free from coffee grounds or debris.
- Inspect Water Reservoir: Confirm that the water reservoir is properly seated and not damaged.
- Examine Water Filter: If your model uses a water filter, ensure it’s correctly installed and not overdue for replacement.
- Contact Support: If problems persist, reach out to Keurig’s customer support for further assistance.
Are there any eco-friendly alternatives to Keurig descaling solutions?
Yes, there are eco-friendly alternatives to commercial descaling solutions:
- White Vinegar: A natural and effective descaler, white vinegar helps break down mineral deposits without harming the environment.
- Citric Acid: Some users opt for citric acid as a descaling agent, as it’s biodegradable and less harsh than chemical alternatives.
When using these alternatives, ensure thorough rinsing of the machine to remove any residual taste or odor.


0 Comments