Hey there, fellow coffee lover! If you’ve found yourself staring at your Keurig K-Classic (K50) and wondering why it’s not powering up, you’re not alone. This is a common issue that many Keurig users face. The good news? In most cases, it’s an easy fix, and you can get back to enjoying your coffee in no time.

Let’s walk through some simple yet effective troubleshooting steps to get your machine back in action.
Step 1: Check the Power Source
Before diving into more complicated solutions, it’s important to start with the basics. Let’s ensure your power source is working correctly.
Ensure the Power Cord is Securely Plugged In
Unplug and Replug: Sometimes, power cords can become loose, and your Keurig might not turn on as a result. Try unplugging the machine and securely plugging it back in. This simple step can often solve the issue.
Pro Tip: It’s a good practice to gently tug on the cord to ensure it’s properly seated into the socket.
Test the Outlet
Try Another Appliance: Plug another device into the same outlet to check if it’s providing power. If the other appliance doesn’t work either, then the issue might be with the outlet.
Use a Different Outlet: If possible, try plugging your Keurig into a different outlet in your home to rule out any issues with the original one.
Step 2: Perform a Basic Reset
Sometimes, your Keurig just needs a reset to clear any temporary glitches.
Unplug the Machine
Wait 30 Minutes: Unplug your Keurig and let it sit for at least 30 minutes. This pause allows internal components to reset. It might seem like a long time, but it can be incredibly effective.
Plug It Back In
Power On: After waiting, plug the machine back in and press the power button to see if it turns on.
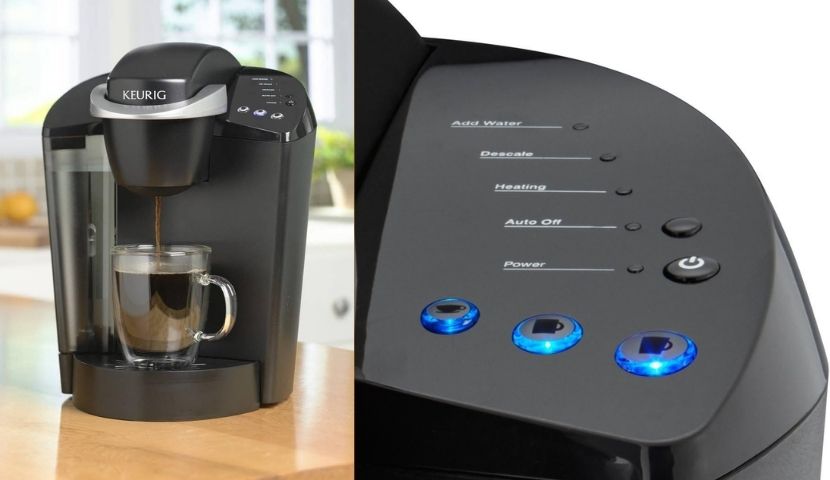
Step 3: Inspect the Power Button
The power button could be the root of the issue. Here’s what to check:
Check for Sticking
Press Firmly: Press the power button firmly to ensure it’s not stuck or unresponsive. Sometimes, dust or debris can cause the button to stick.
Tip: If your Keurig has a “reset” button, make sure that hasn’t been pressed by accident.
Look for Physical Damage
Examine for Cracks or Damage: Carefully inspect the power button for any visible cracks or physical damage. A damaged button can prevent the machine from powering up, and may need to be replaced.
Step 4: Clean the Machine Thoroughly
A clean machine is a happy machine. Over time, coffee oils, residue, and mineral deposits can affect your Keurig’s performance, including its ability to power up.
Clean the Needles
Use a Paperclip: Insert a paperclip gently into the needle area to dislodge any coffee grounds or debris. These tiny blockages can sometimes interfere with the machine’s ability to function properly.
Descale the Machine
Use a Descaling Solution: Mineral buildup from hard water can clog up your Keurig and prevent it from turning on. Use a descaling solution designed for Keurig machines to run a cleaning cycle and remove mineral deposits.
Tip: Make sure to follow the descaling instructions in your user manual for the best results.
Step 5: Check for Internal Issues
If the machine still won’t turn on, there could be an internal issue. If you’re comfortable, here are a few steps to check:
Inspect for Visible Damage
Look for Loose or Damaged Wires: Open up the Keurig (only if you’re comfortable doing so) and inspect the internal components for any loose or disconnected wires. If you notice anything out of place, this could be the issue.
Check for Burnt Parts: Also, look for signs of burnt components, which could indicate a problem with the internal circuitry.
Consult a Professional
Seek Expert Help: If you’re not comfortable inspecting the internal components yourself, it’s best to consult a professional technician. Keurig offers service options, and many third-party repair services specialize in coffee machines.
Step 6: Consider External Factors
Sometimes, things beyond your control can affect your Keurig’s functionality. Here’s what to check:
Check the Water Reservoir
Ensure Proper Placement: The water reservoir needs to be properly seated in the machine to avoid issues. Make sure it’s placed correctly, with no gaps or misalignments.
Tip: A misaligned water reservoir can sometimes prevent the machine from turning on, so double-check this part.
Examine the Drip Tray
Empty Regularly: If the drip tray is overflowing, it could cause the machine to malfunction. Empty it regularly and ensure it’s clean and free of any obstructions.
Step 7: Consult the User Manual
Your Keurig K-Classic (K50) comes with a user manual, and it’s always a good idea to refer to it for troubleshooting steps. Here’s why:
Refer to the Troubleshooting Section
Follow Manufacturer’s Advice: The user manual often provides specific troubleshooting steps tailored to your model. If you’ve followed the basic steps here and are still having issues, your manual could offer a more targeted solution.
Step 8: Contact Keurig Customer Support
If you’ve tried everything and your Keurig still won’t turn on, it’s time to reach out to Keurig’s customer support team.
Reach Out for Assistance
Contact Details: Visit Keurig’s official website for contact information. They offer support through phone, email, and live chat. If your machine is still under warranty, you may be eligible for a replacement.
Quick Troubleshooting Tips
Here are some quick tips to keep your Keurig running smoothly:
- Use Filtered Water: Helps prevent mineral buildup that can affect performance and longevity.
- Regular Cleaning: Regular maintenance can extend the life of your machine. Clean it thoroughly every 1-2 months.
- Avoid Overfilling: Always ensure you’re not overfilling the water reservoir. Overfilling can lead to leaks or other issues.
Final Thoughts
Don’t let a non-working Keurig ruin your day! By following these simple steps, you can often resolve the issue without needing to call in a professional. Regular cleaning and maintenance will also help keep your machine in tip-top shape for many years of delicious coffee.
❓ Frequently Asked Questions (FAQs)
My Keurig still won’t turn on after following these steps. What should I do?
If your Keurig remains unresponsive after all of these troubleshooting steps, it might be time to contact Keurig customer support for further assistance. They can guide you through more advanced troubleshooting or provide a replacement if it’s still under warranty.
How often should I clean and descale my Keurig?
To maintain optimal performance, it’s recommended to clean and descale your Keurig every 3–6 months, depending on usage. If you use your Keurig daily, consider descaling more frequently.
Can I use vinegar to descale my Keurig?
Yes, vinegar is a common descaling solution. However, Keurig also offers a specially formulated descaling solution designed for their machines. Using this can provide a more thorough clean and may prevent damage to internal parts.
Troubleshooting Summary
Here’s a quick overview of the troubleshooting steps you can follow to fix your Keurig K-Classic (K50) when it won’t turn on:
| Step | Action |
|---|---|
| 1 | Check the power source |
| 2 | Perform a basic reset |
| 3 | Inspect the power button |
| 4 | Clean the machine thoroughly |
| 5 | Check for internal issues |
| 6 | Consider external factors (e.g., water reservoir, drip tray) |
| 7 | Refer to the user manual |
| 8 | Contact Keurig customer support |
By following these steps, you’ll increase your chances of getting your Keurig K-Classic (K50) back to working order. Most issues can be fixed with a little troubleshooting and care. Enjoy your next cup of coffee!


0 Comments