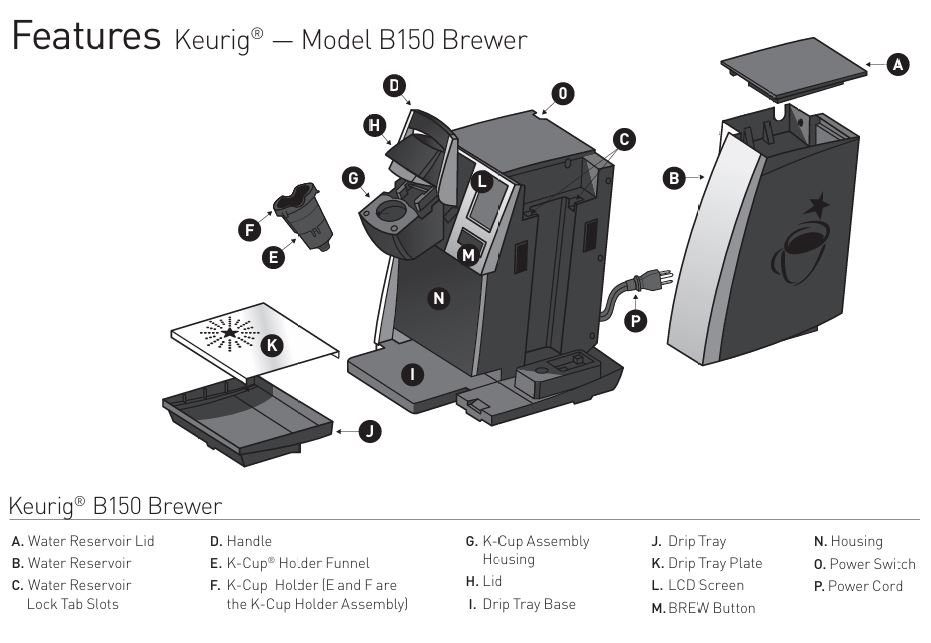
The Keurig B-150 Commercial Coffee Maker is a popular choice for businesses and coffee lovers. However, like any appliance, it may encounter issues that prevent it from functioning properly. In this comprehensive troubleshooting guide, we’ll walk you through the most common problems and their solutions. Whether you’re facing a lack of power, brewing issues, or water quality concerns, we’ve got you covered.

Common Problems with the Keurig B-150 Series Commercial K-Cup Coffee Brewing Machine
1. No Power
- Symptoms: The coffee maker doesn’t power on, and the screen remains blank.
- Possible Causes:
- The machine is not properly plugged in.
- Faulty power outlet.
- Blown fuse or tripped circuit breaker.
- Solution: Ensure the machine is properly plugged in and connected to a working outlet. Reset your home’s circuit breaker if necessary.
2. Brewer Not Brewing
- Symptoms: The machine powers on, but no coffee is brewed when you press the brew button.
- Possible Causes:
- The handle is not securely closed.
- The water reservoir is either empty or not properly seated.
- The needle may be clogged.
- A malfunctioning pump or heater.
- Solution: Ensure the handle is securely closed, the water reservoir is filled, and check for blockages in the needle.
3. Water Quality Issues
- Symptoms: The coffee has an unpleasant taste (chlorine, mineral flavors).
- Possible Causes:
- Hard water or impurities in the water supply.
- Need for regular descaling.
- Solution: Use filtered or bottled water, and make sure to descale the brewer regularly to prevent mineral buildup.
4. Partial Cup Brewing
- Symptoms: The coffee maker brews only part of the cup.
- Possible Causes:
- Clogged exit needle or K-Cup holder.
- Insufficient water supply due to a dirty water reservoir.
- Solution: Clean the K-Cup holder and exit needle, and ensure the water reservoir is properly filled and seated.
Step-by-Step Troubleshooting Guide for Keurig B-150
Step 1: Check the Power Source
Before attempting more complex fixes, ensure that the Keurig is properly plugged into a working power outlet. Use a different outlet if necessary.
Action:
- Unplug the coffee maker from the power source.
- Check for any visible damage to the power cord or plug.
- Try plugging the unit into a different outlet.
- Reset your home’s circuit breaker if necessary.
Note: Always use a dedicated circuit for the Keurig B-150 to avoid overloading the electrical system.
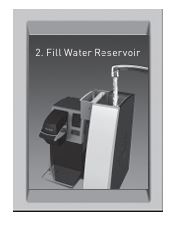
Step 2: Ensure Proper Water Supply
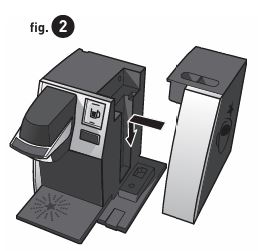
The Keurig B-150 requires a sufficient water supply to brew coffee. If the machine powers on but won’t brew, it could be due to water flow issues.
Action:
- Verify the water reservoir is filled to the correct level.
- Make sure the water reservoir is properly seated in place.
- If the “FILL WATER RESERVOIR” message appears, refill the tank.
- Ensure the water reservoir lid is securely closed.
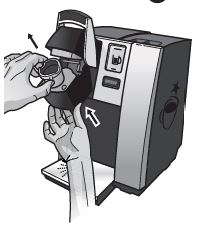
Step 3: Examine the Handle and K-Cup Holder
Brewing issues may arise if the handle isn’t securely closed or if the K-Cup is misaligned.
Action:
- After inserting the K-Cup, ensure that the handle is securely pressed down.
- Check the K-Cup holder for any obstructions or misalignments.
- Clean the K-Cup holder and needle to prevent clogs.
Tip: Regular cleaning of the K-Cup holder and needles ensures smooth operation and prevents clogs.
Step 4: Clean and Descale the Coffee Maker
Hard water can cause mineral buildup that leads to performance issues, such as slow brewing or partial cups.
Action:
- Descale Regularly: Run a descaling cycle every 3-6 months using white vinegar.
- Clean the Needles: Use a paper clip or similar tool to clear blockages in the exit needle and K-Cup holder.
- Clean External Parts: Wipe down the external parts with a damp cloth and rinse the drip tray frequently to avoid overflow.
Pro Tip: Descaling the brewer not only improves performance but also prolongs the lifespan of your coffee maker.
Step 5: Check for Error Messages
If your Keurig displays error messages like “ADD WATER” or “HEATING PLEASE WAIT,” these indicate that the machine is not functioning properly.
Action:
- Follow the on-screen instructions to resolve the issue.
- Check that the water reservoir is seated properly and filled.
- Reset the machine by turning it off and on again.
Note: Some error messages may indicate a need for a cleaning or descaling cycle.
Step 6: Reset the Machine to Factory Settings
If your Keurig B-150 continues to malfunction despite troubleshooting, it may be helpful to reset the machine to its default settings.
Action:
- Turn off the brewer.
- Press and hold the display for 5 seconds while turning the power back on.
- The machine will reset to factory settings.
Reminder: Resetting the machine will clear custom settings, so you’ll need to reprogram preferences such as the brew temperature and size.
| Problem | Solution |
|---|---|
| Brewer doesn’t power on | Check the plug and outlet. Reset the circuit breaker. |
| Brewer not brewing | Ensure the handle is secure and the water reservoir is full. |
| Chlorine or mineral taste in coffee | Use filtered or bottled water. Clean the system regularly. |
| Brewer only brews a partial cup | Clean the exit needle. Check the water reservoir and plumbing. |
Advanced Troubleshooting
Water Pump Issues
In some cases, the water pump may fail to draw water from the reservoir, preventing the brewing process from starting.
Action:
- Check for air bubbles in the water line.
- Perform a cleansing brew (no K-Cup) to clear the system.
- If the pump continues to malfunction, the unit may require professional servicing.
Heating Element Problems
If the machine isn’t heating water to the right temperature, it may be an issue with the heating element.
Action:
- Run a descaling cycle to clear any mineral buildup around the heating element.
- If the problem persists, contact Keurig support for repairs or replacement.

Frequently Asked Questions (FAQs)
How often should I clean and descale my Keurig B-150?
Keurig recommends descaling every 3-6 months. If you use hard water, you may need to descale more frequently to prevent mineral buildup.
The LCD screen is blank. What should I do?
Check the power supply and ensure the unit is plugged in. If the power is fine, reset the machine by turning it off and on again.
Can I use any kind of water in my Keurig?
For optimal taste and longevity, it’s best to use filtered or bottled water. Hard water can cause scaling and affect the taste of your coffee.
How do I reset the Keurig B-150 to factory settings?
To reset, press and hold the display while turning on the machine. Keep pressing for 5 seconds to restore factory settings.
Conclusion
By following this troubleshooting guide, you should be able to resolve most issues with your Keurig B-150 Commercial Coffee Maker. Regular maintenance, such as cleaning and descaling, is key to ensuring your brewer continues to perform at its best. If problems persist, don’t hesitate to contact Keurig customer service for professional support. Enjoy your perfectly brewed cup every time with a properly functioning Keurig!


0 Comments