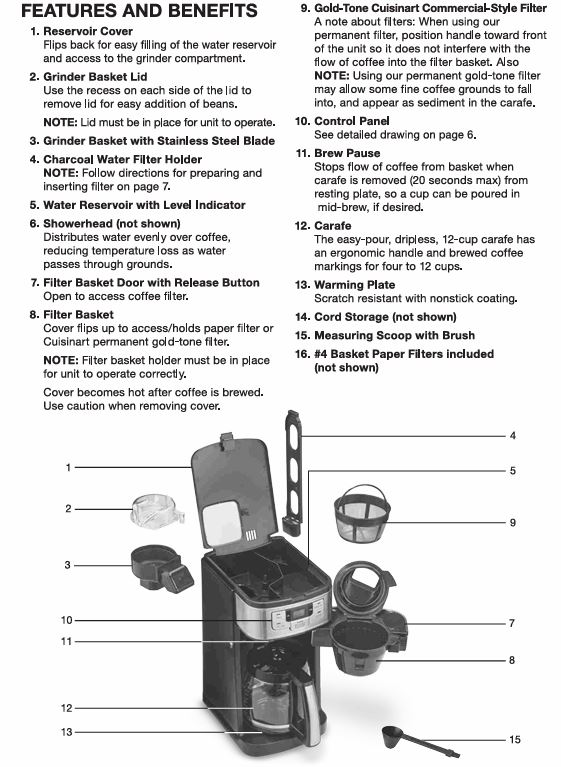
The Cuisinart DGB-400NAS 12-Cup Automatic Grind & Brew Coffee Maker is a popular choice for coffee enthusiasts seeking a fresh and convenient way to brew coffee. This machine combines a coffee grinder with a brewer, allowing you to grind your own beans before brewing for a more flavorful cup of coffee. However, like all appliances, it may encounter issues over time.
In this comprehensive guide, we’ll walk you through common problems and provide step-by-step troubleshooting to help you fix your coffee maker.
Why Is Your Cuisinart Coffee Maker Not Working?
Before we dive into the solutions, let’s first understand the common issues that can prevent your Cuisinart DGB-400NAS from working properly:
- Coffee not brewing
- Grinder not working
- Water not draining
- Machine not turning on
- Overflowing coffee
- Not brewing hot enough coffee
Each of these issues has specific causes, and we’ll go through them one by one, offering effective solutions.
1. Coffee Not Brewing: Causes & Solutions
Possible Causes:
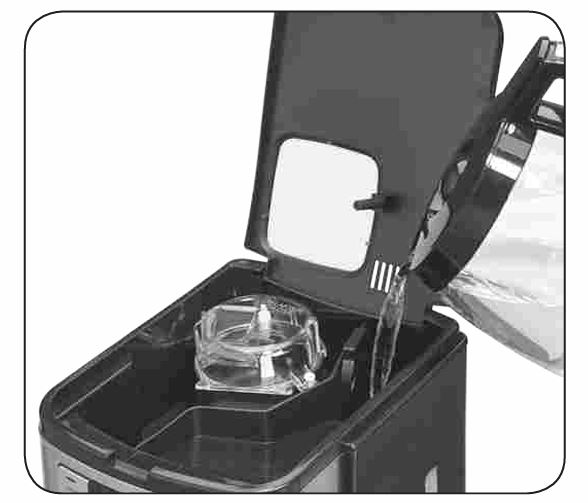
- Water Reservoir Issues
- Cause: The water reservoir may be improperly filled, or there may be blockages.
- Solution: Ensure the reservoir is properly filled and the lid is securely closed. Check for any blockages in the water inlet.
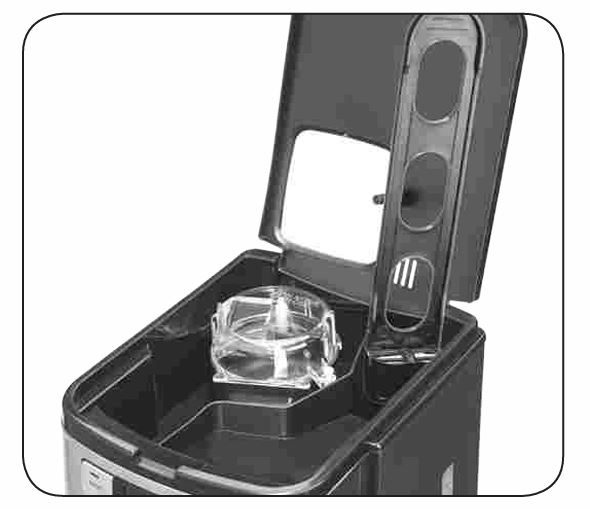
- Brew Basket Blockage
- Cause: Coffee grounds may be clogging the brew basket, preventing water from flowing through.
- Solution: Empty the basket and clean it thoroughly. Ensure you are not using an overly fine grind, as this can clog the filter.
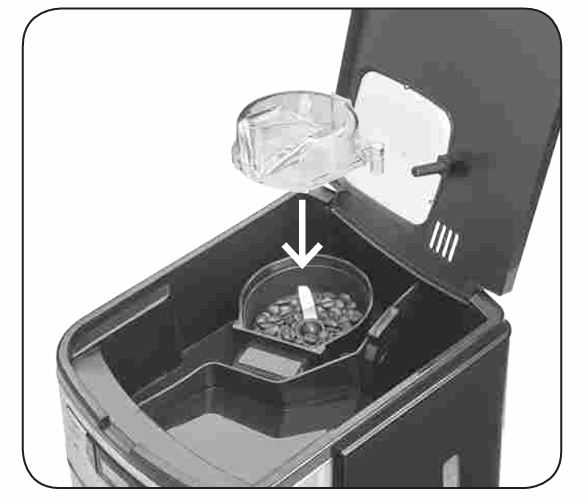
- Grinder Malfunction
- Cause: If you’re using whole beans, the grinder may be malfunctioning.
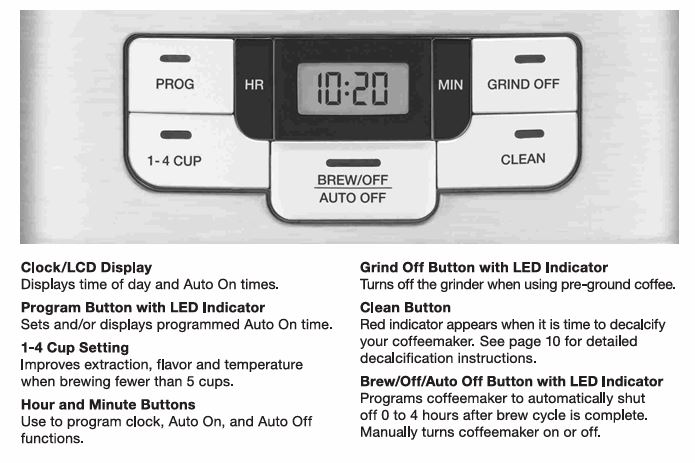
- Solution: Press the “Grind Off” button to stop the grinding function if you’re using pre-ground coffee. If grinding is the issue, clean the grinder by following the maintenance instructions in the manual.
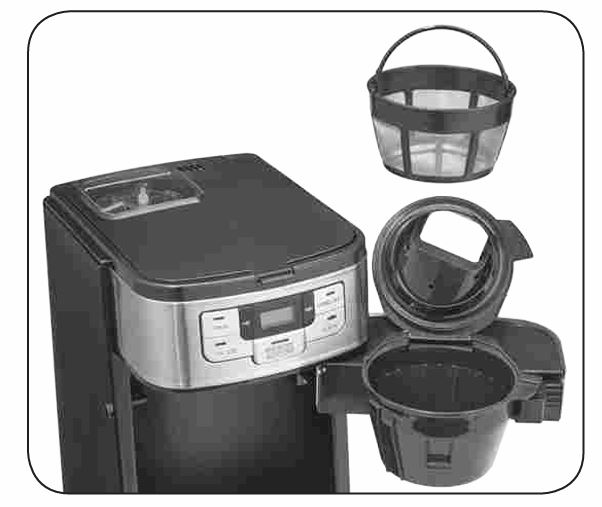
- Incorrect Filter
- Cause: If you’re using two filters or the wrong type of filter, it may cause issues with brewing.
- Solution: Use the Cuisinart Gold-Tone Commercial-Style Filter or a #4 basket paper filter. Do not combine filters unless specified.
Step-by-Step Fix:
- Remove the filter basket and empty any coffee grounds.
- Clean the basket thoroughly with warm, soapy water.
- Ensure that no coffee grounds are spilling over the filter.
- Make sure the reservoir is filled and the lid is securely in place.
- Try brewing a pot of coffee again.
2. Grinder Not Working: Causes & Solutions
Possible Causes:
- Grinder Jam
- Cause: Coffee beans may have jammed the grinder, preventing it from functioning.
- Solution: Open the grinder basket and check for any jammed beans. Remove any blockages carefully.
- Incorrect Bean Type
- Cause: Using beans that are too oily or too moist can cause the grinder to malfunction.
- Solution: Use fresh, dry beans that are suitable for grinding.
- Malfunctioning Grinder Motor
- Cause: The motor may have stopped working due to a mechanical fault.
- Solution: If the grinder motor is not turning on, the unit may need professional repair.
Step-by-Step Fix:
- Unplug the coffee maker and check the grinder for blockages.
- Remove any jammed beans and clean the grinder with a brush.
- Try grinding again with fresh beans.
3. Water Not Draining: Causes & Solutions
Possible Causes:
- Clogged Filter Basket
- Cause: Coffee grounds may have clogged the filter basket, preventing water from draining.
- Solution: Clean the filter basket and ensure the coffee grounds are not too fine.
- Airlocks or Blockages in the Water Line
- Cause: Airlocks or debris in the water line can prevent water from flowing.
- Solution: Ensure the water line is free from blockages. Run a cycle with just water to clear any blockages.
- Damaged Water Reservoir
- Cause: If the water reservoir is cracked, water may leak out before it reaches the brewing chamber.
- Solution: Check the reservoir for damage. If the reservoir is cracked, you may need to replace it.
Step-by-Step Fix:
- Open the water reservoir and check for any visible cracks.
- Make sure the filter basket is free of debris and properly installed.
- Run a cycle with just water to ensure the water is flowing correctly.
4. Machine Not Turning On: Causes & Solutions
Possible Causes:
- Power Supply Issues
- Cause: The appliance may not be properly plugged in or there may be an issue with the electrical outlet.
- Solution: Check the power cord and make sure the appliance is plugged in. Test the outlet with another appliance to ensure it is working.
- Faulty Switch or Circuit
- Cause: The power switch or internal circuits may be damaged.
- Solution: If the machine doesn’t turn on, check for any loose connections inside the machine. If necessary, contact customer support for further assistance.
- Power Surge
- Cause: A power surge may have caused the coffee maker to malfunction.
- Solution: Unplug the machine, wait for a minute, and then plug it back in.
Step-by-Step Fix:
- Check the power cord for damage and ensure the coffee maker is plugged in securely.
- Test the outlet with another appliance to confirm it’s working.
- If the issue persists, reset the coffee maker by unplugging it for a minute, then plug it back in.
5. Overflowing Coffee: Causes & Solutions
Possible Causes:
- Too Much Coffee Grounds
- Cause: Using too much coffee grounds can cause the machine to overflow.
- Solution: Follow the recommended amount of coffee grounds as per the instruction manual—usually one tablespoon per cup.
- Clogged Filter
- Cause: A clogged filter can prevent proper water flow, causing overflow.
- Solution: Ensure that the filter is not overfilled and that it is free of debris.
- Incorrect Filter Use
- Cause: Using two filters at once can cause overflow.
- Solution: Use only one filter at a time and ensure it is placed correctly.
Step-by-Step Fix:
- Reduce the amount of coffee grounds being used to the recommended amount.
- Clean the filter basket and ensure no grounds are spilling over.
- Make sure only one filter is used.
6. Coffee Not Hot Enough: Causes & Solutions
Possible Causes:
- Brewing Temperature Too Low
- Cause: The brewing temperature may be set too low.
- Solution: The DGB-400NAS model does not allow you to set brewing temperature manually, but if your coffee is too cold, you can try using the 1-4 cup setting, which increases water temperature for small batches.
- Old Coffee
- Cause: If the coffee sits too long on the warming plate, it can cool down.
- Solution: Remove the carafe from the warming plate after brewing, and consider getting a thermal carafe that keeps coffee hot for longer periods.
Step-by-Step Fix:
- If brewing fewer than 5 cups, press the 1-4 cup button before brewing.
- Avoid letting the coffee sit too long on the warming plate.
- Consider using a thermal carafe for better heat retention.
FAQs:
Q1: Can I use any kind of coffee beans with the Cuisinart DGB-400NAS?
Yes, but it’s recommended to use fresh, dry coffee beans. Avoid oily or moist beans as they can cause the grinder to malfunction.
Q2: How do I clean the coffee maker properly?
Clean the filter basket, grinder basket, and carafe after each use. Use warm, soapy water and ensure no water enters the unit’s motor or electrical components.
Q3: How often should I decalcify my Cuisinart DGB-400NAS?
It’s recommended to decalcify your machine every 60 days or after 60 uses. If you have hard water, consider decalcifying more frequently.
Conclusion
If your Cuisinart DGB-400NAS Automatic Grind & Brew Coffee Maker isn’t working, don’t panic. By following this troubleshooting guide, you should be able to identify and fix the problem. Whether it’s a water flow issue, grinder malfunction, or brewing temperature, each problem has an effective solution.
Remember, regular maintenance, including cleaning and decalcifying, is essential to prolong the life of your coffee maker. If these troubleshooting tips don’t resolve the issue, consider reaching out to Cuisinart customer support or a professional repair technician.


0 Comments